
Searching & Filtering
You can use the filter and search functions to reduce the list of students to fit a certain criterion. When using the search box, results will automatically update after you stop typing. The search box searches by student name.To filter, click the Funnel icon next to the search box. A dropdown menu will appear with the categories available to filter. Categories will only appear if there is more than one filter available to filter from based on the initial starting criteria. Click the category you wish to filter where the available values with toggle buttons will expand. Toggle on / off the values you wish to filter by. You can add multiple filter values as well as multiple filters from other categories together in a single search. As you toggle on / off, your results will update instantaneously.
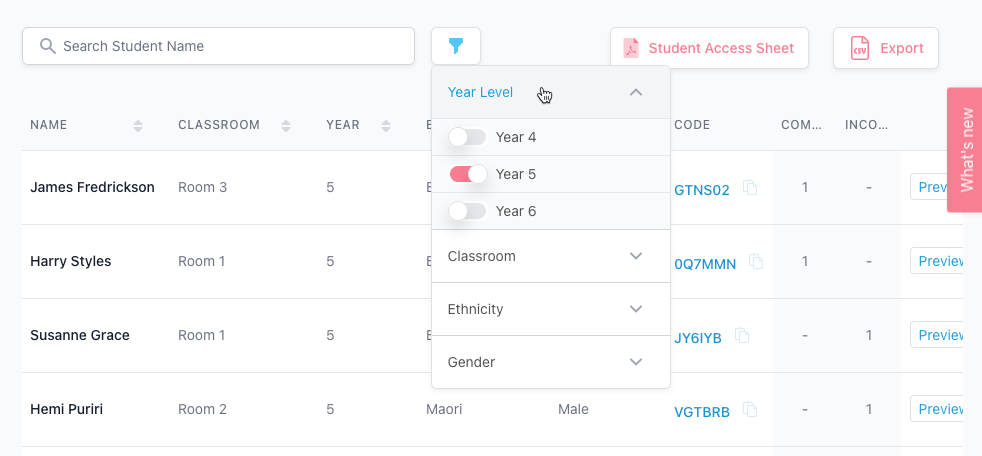
You can also sort in Ascending or Descending on Name, Classroom, Year or Gender. To do this, select the down / up arrows on the column name. Click again to switch between ascending and descending order.
Exporting as a PDF or Excel CSV will inherit the filters you have selected. For example, if you filter only the Males in Year 5 - your export will only contain these filtered results.
Add, Editing or Deleting a student
To create a new student, click the blue 'Add Student' button located on the right of the header text. To edit a student, click the Edit button on the student you wish to edit. A slide over dialogue will appear on the left hand of your screen.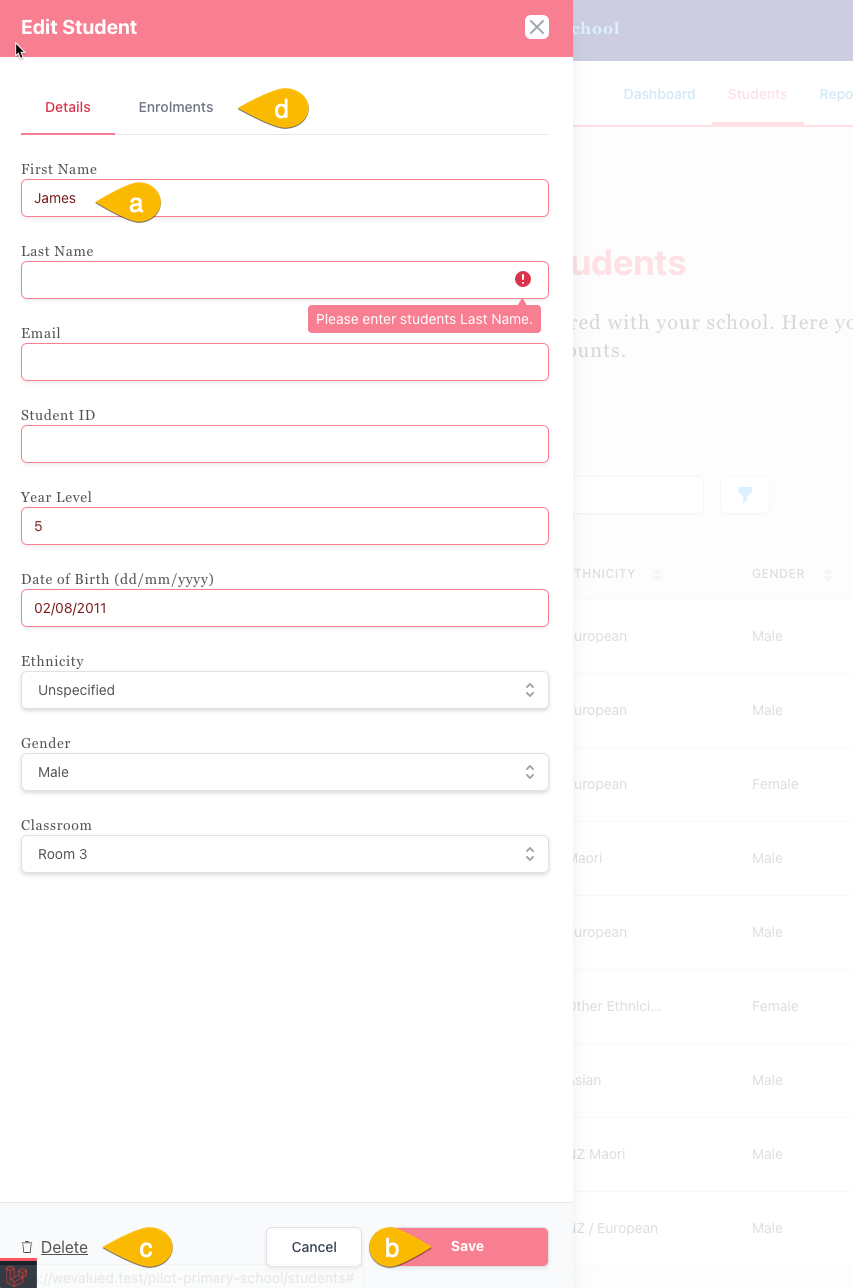
From within the slide over dialogue, you can edit the student's information (a). If you empty or do not complete a required field, a message will appear on that field. After you have completed editing click save (b). To delete a student clickDelete on the bottom left corner (c) - A confirmation alert box will appear asking if you are sure you wish to delete the student. To update enrolment information select the (d) tab.
To update student information in bulk, you can utilise the import function, this can be found here.